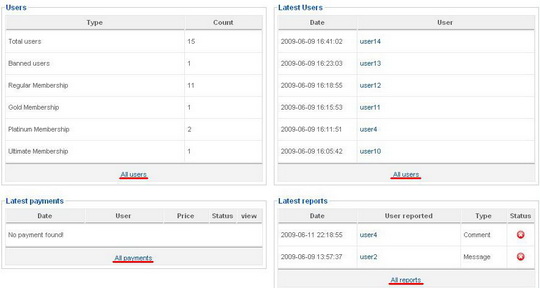
- Dashboard- the dashboard section shows a general statistic of your website, like the total number of users and the number of users for each Membership Plan. You also find the latest info on reports, payments and newly registered users.
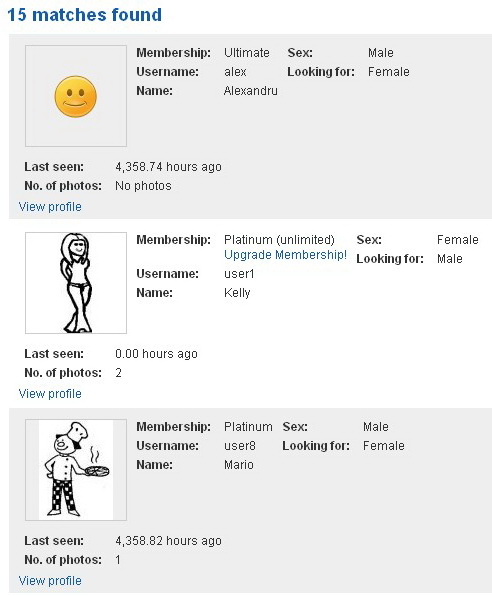
- User Management- a full list of users is displayed along with some basic information:type of membership and when it ends, registration date and current status(banned or not).


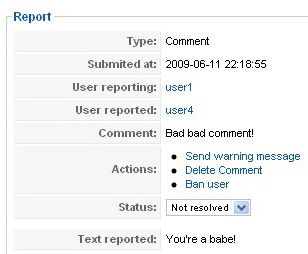
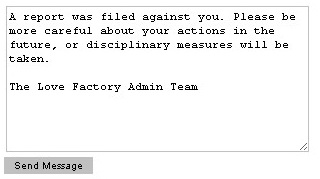
- Reported Messages and Comments- All reports regarding offensive comments, messages or pictures are shown here, they can be filtered by type or status.

- Payments Management- this is a list of all payments, pending or completed along with some general information about them, price, type of membership or method of payment (PayPal or Moneybookers) that are waiting for validation.
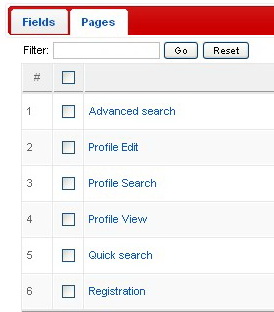
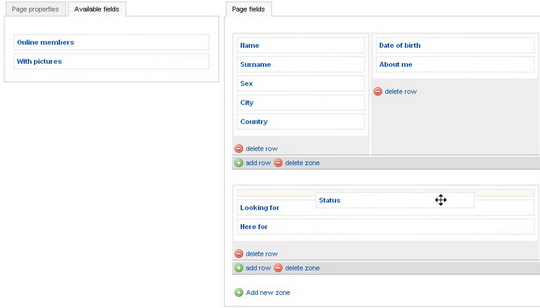
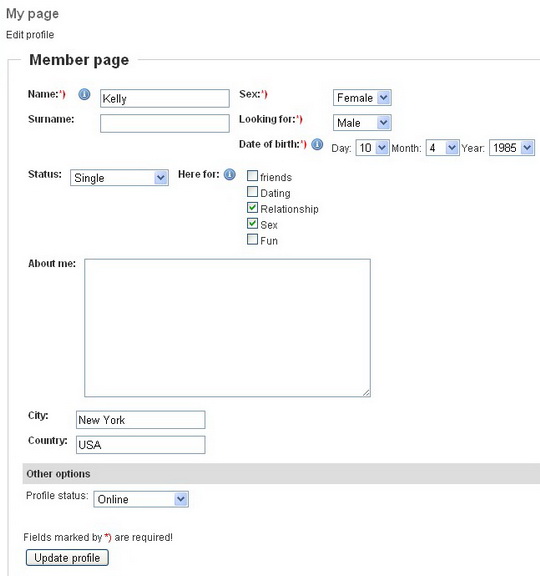
- Fields- Here you can add fields and organize them in the pages, they can be grouped by row and zone, you can choose on what pages they will show and all this can be done with a very easy to use drag & drop method.


- Text field: choose a maximum number of characters.
- Text area: choose a number of columns and rows.
- Drop down (single select): add the options, one per line, that will show in a drop down bar.
- Drop down (multiple select): same as single select but with a row/column display option
- Checkboxes: add the options, one per line, and choose how they will be displayed, row or column.
- Radio buttons: add the options, one per line, and choose how they will be displayed, row or column.
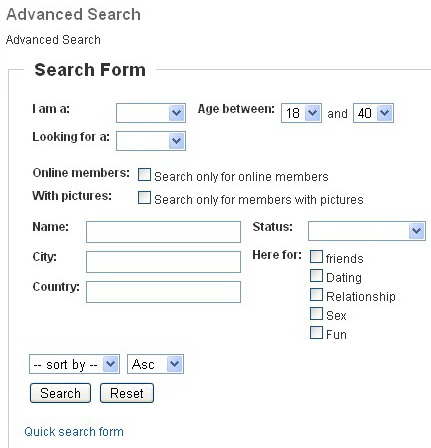
- Birth date: choose a minimum and maximum age.
- Sex: write your gender options, one per line.
- Looking for: friend, sex, life partner,etc..., one per line.
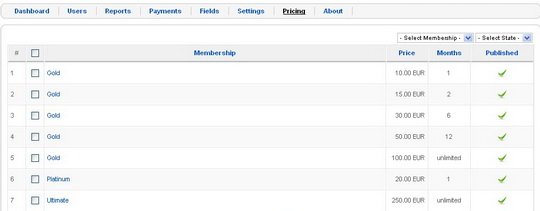
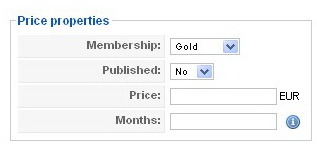
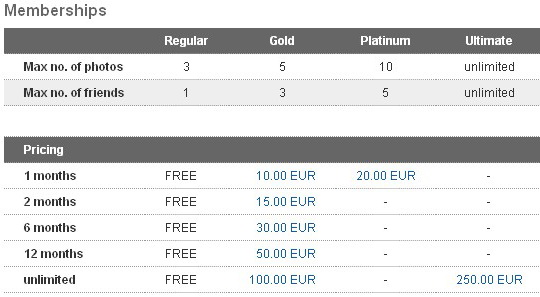
- Pricing: For the upper class memberships (1-3) you can set individual payment plans where you can set the price and number of months.
- About: Your version of Love Factory and the latest version, along with links to the developer are shown here.
A common Menu Layout in your installation would look like this:
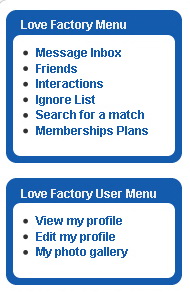

You can find your friends in the Friends page found in the Love Factory menu, regular users have a limited number of friends depending on the administrator settings, to increase your friends list capacity a Membership Plan can be purchased. The friends list allows you to quickly locate your favorite users and send them messages.





You can now add custom fields without any php coding. Just administrate your fields and display them in the templates, where you want.
How to create a new custom field?
Just follow this simple steps:
- Enter the Custom Fields Administrator in Component Administration: "Settings" / "Custom Fields" menu icon.
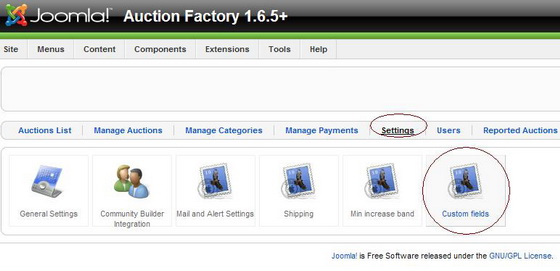
- Hit the "New" menu in the toolbar and enter your new field properties.
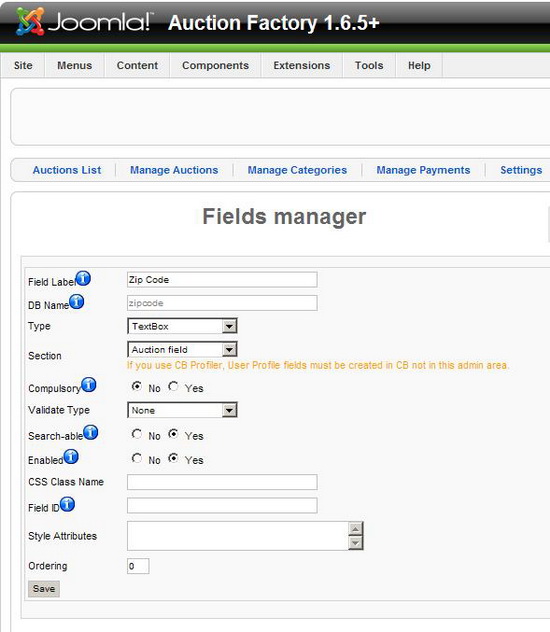
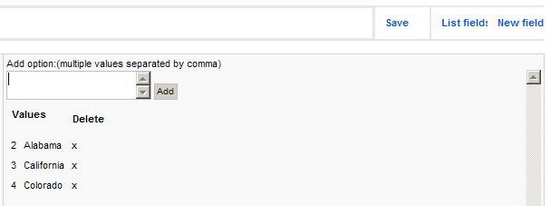
- Compulsory settings for functioning are the label, db name, type and section. In the screenshot it's been created a Zip code field for a Auction item. You can create custom fields for auctions and users (for the latter only if CB is not used). Also you can select the propper field type from the list: textbox, textarea, select list, radio, editor. Some types of fields require extra parameters to setup. The list types require the options to be stored to.
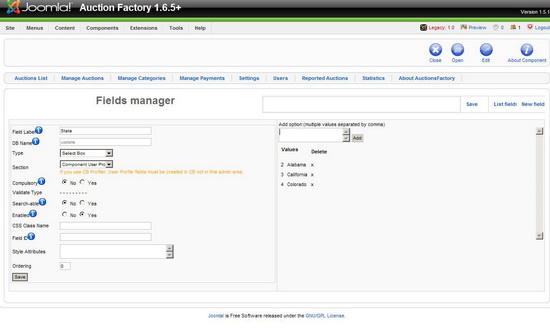
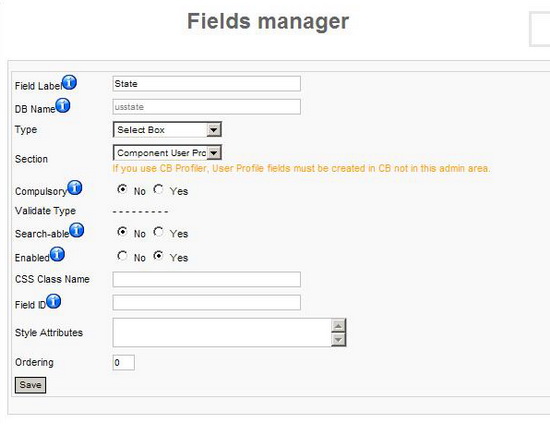
How to display the new created custom filed?
First of all if you are an inexperienced user, we recommend to check first our template tutorial. There are four places where you may want to customize your fields appearance.
- Edit Forms
The fields are automatically displayed by the code blocks for "user profile" and "auction":
1. bids.html.php / editUser() or editAuction() method
/**
* CUSTOM Fields
*/
$Fi = & FactoryFieldsFront::getInstance();
$fields = $Fi->getHTMLFields(__SECTION__, $user->userid);
$smarty->assign("profiler", $fields);
OBS: __SECTION__ is one of "user_profile" or "bids".
2. t_myuserdetails.tpl or t_editauction.tpl
{foreach from=$profiler item=field}
<tr>
<td>{$field.field_name}</td>
<td>{$field.field_html}</td>
</tr>
{/foreach}
For manual positioning in the template just display the {$profiler} smarty list element that you want:{$profiler.0.field_name}: {$profiler.0.field_html}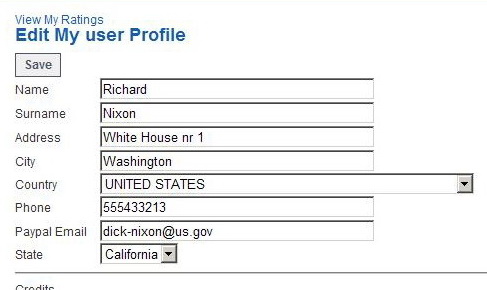
- Display on auction / user page
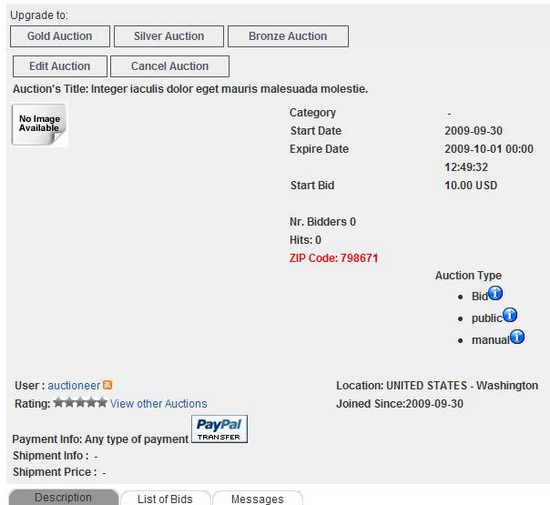
On the auction page (t_auctiondetails.tpl) you can manually add your fields by inserting {$auction->custom_field_db_name}.
{$auction->my_custom_field_db_name}
or in the user page (t_userdetails.tpl) the same but the smarty variable name is {$user->my_custom_field_db_name}
- Display on search page
By default the fields setup as searchable are displayed automatically by this sequence of smarty in the t_search.tpl:
{foreach from=$profiler item=field}
<tr>
<td>
<table>
<tr>
<td>{$field.field_name}</td>
<td>{$field.field_html}</td>
</tr>
</table>
</td>
</tr>
{/foreach}- Display on auction list page
Auction fields can be manually added in the list template in the specific/ desired list template cell: t_listauctions_cell.tpl / t_myauctions_cell.tpl / t_mybids_cell.tpl / t_mywatchlist_cell.tpl / t_mywonbids_cell.tpl
<div>You can choose to display the field as a filter link:
<span>ZIP</span>
<span >
{$current_row->zipcode}
</span>
</div>
<div id="auction_date">
<span>{$smarty.const.bid_start_bid_text}</span>
<span id="auction_price_bold">
{$current_row->initial_price|string_format:"%.2f"} {$current_row->currency_name}
</span>
</div>
<div>
<span>ZIP</span>
<span >
<a href="index.php?option=com_bids&task=showSearchResults&zipcode=
{$current_row->zipcode}">
{$current_row->zipcode}
</a>
</span>
</div>
<div id="auction_date">
<span>{$smarty.const.bid_start_bid_text}</span>
<span id="auction_price_bold">
{$current_row->initial_price|string_format:"%.2f"} {$current_row->currency_name}
</span>
</div>
First of all check your Virtuemart version. Our Joomla 1.0.x component works with Virtuemart 1.0.x version and the Joomla 1.5.x Gadget Factory has support for Virtuemart 1.1.x version. For further requirements check here.
The Factory is providing three unique and very detailed VM gadgets for Windows which will work with any of the component version as long as the requirements are fulfilled. Since we are also Virtuemart users and we appreciate the powerful tool, we wanted to bring also a significant contribution to the community with this special featured gadgets.
All three gadgets should be installed like described in our gadget configuration documentation. After this you can proceed with each particular settings.
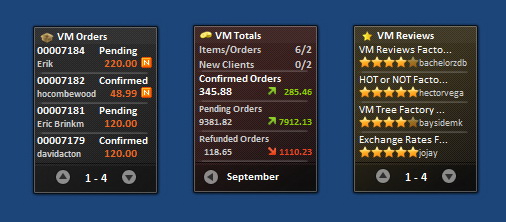
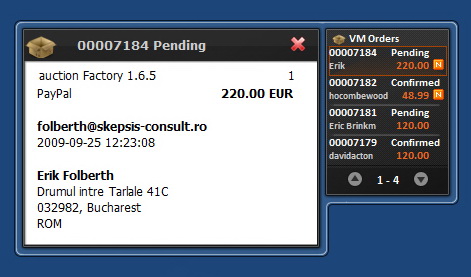
VM Orders displays the latest VirtueMart (e-Commerce) Shop Orders information. Following information are available directly in the widget display:
- Order number
- Order status
- User name
- Order value
- New orders marked
VM Orders flyout contains in the title the order number and the order status. In the flyout are then displayed the following:
- List of aquired products and their number
- Payment method
- Order Value
- Customer email address
- Customer complete name
- Customer Address (address 1 from VM)
- Customer Area code
- Customer City
- Customer Country
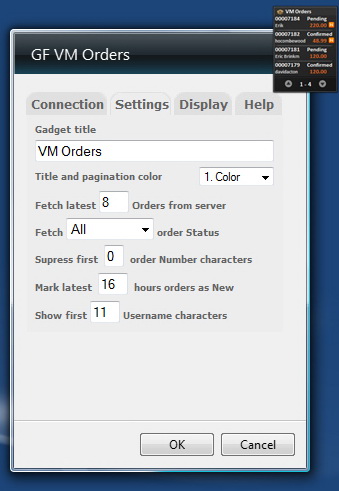
VM Orders has the following particular settings available:
- Gadget Title (more info under http://www.thefactory.ro/documentation/gadget-factory-installing-windows-gadget.html).
- Title and pagination color.
- Fetch latest x orders from server (the number of latest order to be retrieved from the server and displayed in the gadget).
- Fetch All/Pending/Confirmed/Canncelled/Refunded/Shipped orders (in case you are interested in checking only orders with a certain status).
- Supress first x order number characters (usually Virtuemart orders are starting with 0000; using this you can supress the 0's and display only the last digits.
- Mark latest x hours orders as new (a small icon will mark the newest orders).
- Show first x username characters (in case the usernames are to long, you can limit them, without messing the gadget display).
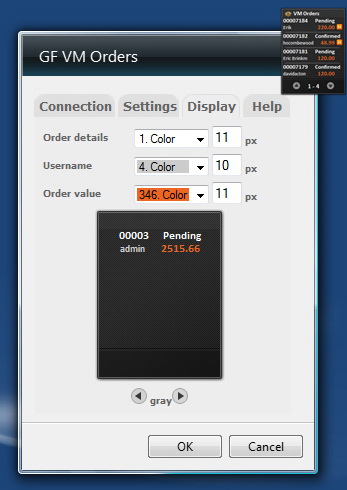
VM Orders allows you to configure the display as follows:
- Order details (color, size)
- Username (color, size)
- Order value (color, size)
- Background theme (gray, red, violet, blue, olive, green, brown)
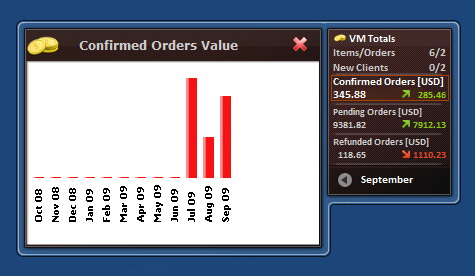
VM Totals displays various VirtueMart (e-Commerce) Shop Reports information, representing one of the smallest reporting tool for Virtuemart but also the fastest and convenient one, making reports accessible directly on the Windows desktop. Following information are available directly in the widget display:
- Cell 1: Items/Orders number and New/All Clients.
- Cell 2: Confirmed Orders value (check the component configuration to define exactly what statuses will be calculated as confirmed!).
- Cell 3: Pending/Refunded/Cancelled/Shipped Orders value.
- Cell 4: Refunded/Cancelled/Shipped Orders value.
VM Totals flyout is available for cell 2, 3 and 4, displaying in the title the correspondent order name status and showing a graphical (bar type) representation with the monthly values. By clicking on the bars, a tooltip will display the exact value for that month. The flyout will display all the months fetched by the widget.
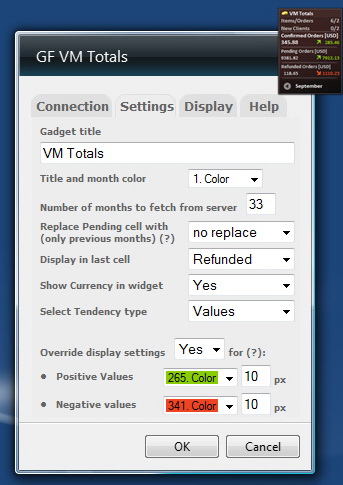
VM Totals has the following particular settings available:
- Gadget Title (more info under http://www.thefactory.ro/documentation/gadget-factory-installing-windows-gadget.html).
- Title and month color.
- Number of months to fetch from server (the number of latest months to be retrieved from the server and displayed in the gadget).
- Cell 3 configuration replacing the pending orders with Refunded, Cancelled or Shipped orders; this settings will change only the display for previous months, not the current month.
- Cell 4 configuration to display Refunded, Cancelled or Shipped orders.
- Show Currency in widget (will display the currency in cell 2, 3 and 4).
- Select tendency type between Values and Percantages. The calculated tendecy for the current month is calculated with the exact period from the previous month, taking under consideration also the exact hours, minutes, sec. For the rest, complete months are calculated.
- Override display settings for tendency positive and negative values (color, size).
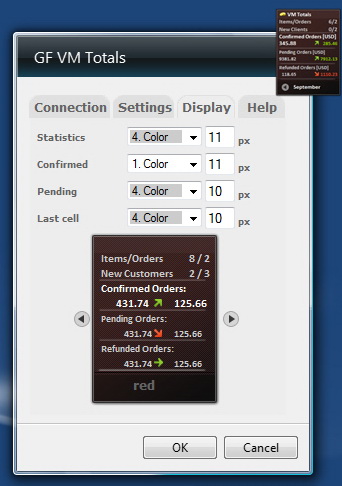
VM Totals allows you to configure the display as follows:
- Statistics including Items/Orders number and New/All Clients (color, size)
- Cell 2: Confirmed Orders (color, size)
- Cell 3: Pending Orders (color, size)
- Cell 4: X Orders (color, size)
- Background theme (gray, red, violet, blue, olive, green, brown)
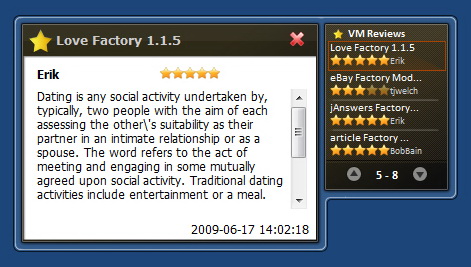
VM Reviews displays the latest VirtueMart (e-Commerce) Product Reviews information. Following information are available directly in the widget display:
- Product name
- Rating (1 to 5 stars)
- User name
VM Reviews flyout contains in the title the product name which received the rating. In the flyout are then displayed the following:
- User name from Joomla that rated the product.
- Rating (1 to 5 stars).
- Complete review.
- Date and time when the review was given.
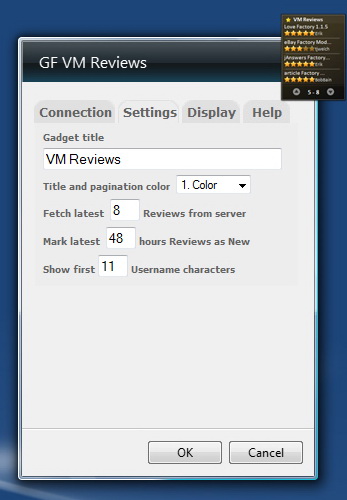
VM Reviews has the following particular settings available:
- Gadget Title (more info under http://www.thefactory.ro/documentation/gadget-factory-installing-windows-gadget.html).
- Title and pagination color.
- Fetch latest x reviws from server (the number of latest reviews to be retrieved from the server and displayed in the gadget).
- Mark latest x hours reviews as new (a small icon will mark the newest reviews).
- Show first x username characters (in case the usernames are to long, you can limit them, without messing the gadget display).
VM Reviews allows you to configure the display as follows:
- Product name (color)
- Username (color, size)
- Background theme (gray, red, violet, blue, olive, green, brown)
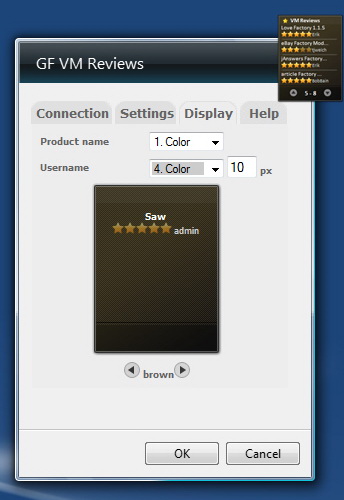
After installing and configuring the website extension you are now ready to install the widgets on any of your computers, which are having a internet connection.
Download the widgets and components only from our site! Our company has all the copyright marks of this applications and you will avoid exposing your data to any malicious code developers who may altered our components!
Locate on your HDD the widget you want to install and double click on it.
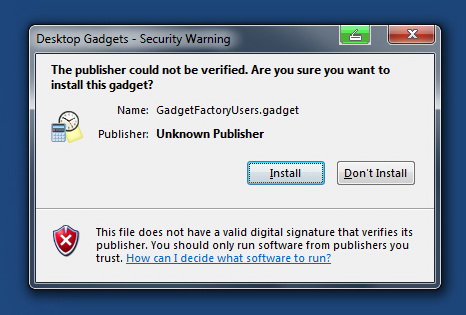
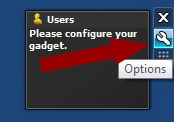
After the widgets are installed they will appear automatically on your desktop (on Windows Sidebar for Windows Vista). Then go to the Widget options in order to configure it.
On the first tab "Connection" type in the URL of your site where you installed and configured the Gadget factory Extension. The main URL is sufficient, you wont have to type in any component path, etc. Type in the password you required at the Extension configuration and set in a refresh interval.
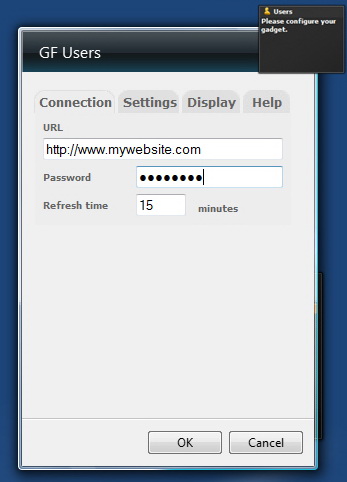
The "Connection" tab is standard for all our widgets. The "Settings" and "Display" tabs may vary depending on each widget functionality. Generally the "Settings" tab is very specific to each widget and the options are functionality dependent. On the "Display" tab, you can choose a widget theme (background) and separated colors for the various information displayed in the widget. A standard setting is the Gadget Title.
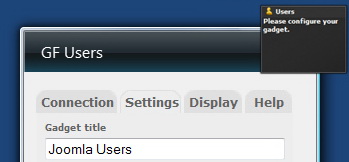
Here you can ad for example the URL of the website, in case you have several website to maintain and to be able to differentiate them better on the desktop.
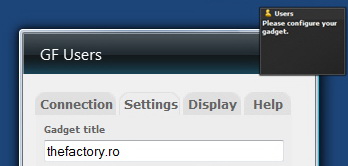
All our gadgets are comming with a ini-file, where all the setting are saved in case you remove the gadget from the desktop, then add it back. This will save users allot of time, without having to configure again the gadget. Note that the ini file saves only the last instance of the gadget, so in case you have multiple instances of the same gadget only the last saved values will be taken under consideration. The ini-file will be deleted from the system, when unsintalling the gadget.Please note that the ini-file contains the access password to the fetched data, so be carefull if you are using a shared computer. if the data is ultra confidential, then we recommand the install only on your own personal computer.
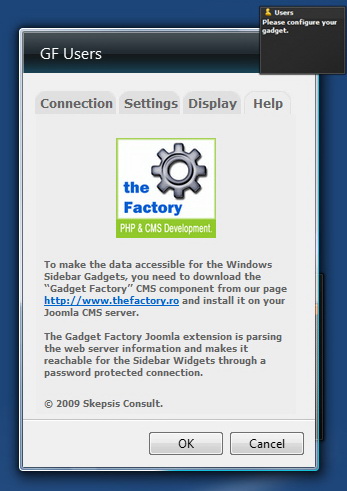
The last tab displays a short note and the link to our website in order to check for documentation and updates.
Data Refreshing.
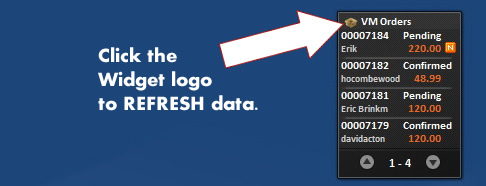
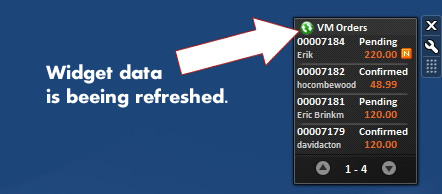
The widget data will be automatically refreshed according to the value you entered in the "Connection" tab. If you need to refresh the data now (manually) then just press the the widget logo.
This will manually refresh all the widget information, displaing then the most recent information available on your site.
For more information and settings check also the Virtuemart Gadgets documentation.
