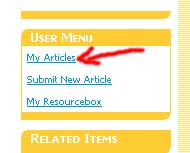
First you must login as a registered user. To register you must provide your username and a valid email. The Email is important since you will receive your communications regarding your articles through email. After you login you should see your user menu like this:

Click on the My Articles and you will be forwarded to the new screen like this:

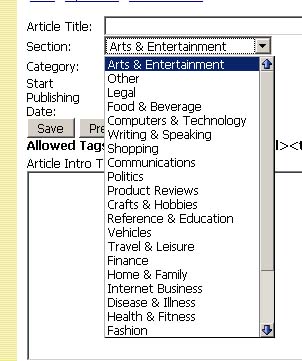
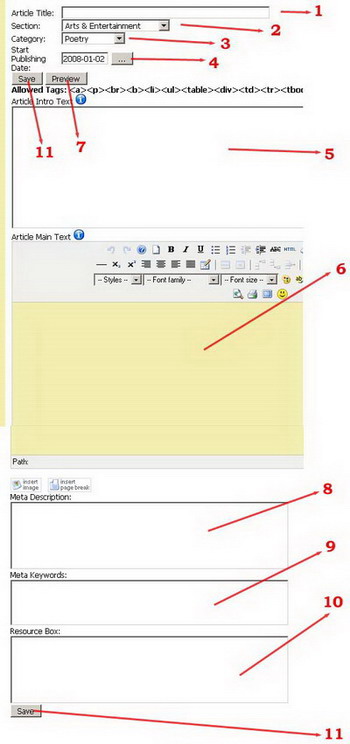
| 1. Article Title - just put the Title of the article here. 2. Section - choose the appropriate Section for your Article. If none applies then pick the "other" section. 3. Categories - choose the most accurate category for your article. This will increase the chances in search engines like Google, and also will help your article not being rejected. 4. Publish Date - you can choose a date in the near future for your article to be published (useful for products not launched yet). 5. Intro Text - it is a short text that will appear on the frontpage of our site and should be a introduction to the article itself. It should not be a summary, since this introduction will appear as the first paragraph of the whole article. so do not repeat it in the main text. Also this Intro text does not allow you using HTML tags. 6. Main Text - this is the main article. There are some html tags allowed. Most important is that you can add up to 4 links to your article in any place you want. Use the Resource box for your signature, do not repeat it in the main article. 7. Preview Button - use it to see a preview of your article with the Site CSS. 8. Meta Description - you may add your own meta info to the article. |
9. Meta Keywords - you may add your own meta info to the article. Meta Description and Keywords will appear in the header of the article page.
10. Resource Box - you may change your resource box for any article, but its recommanded to save the most used in your resource box section in order to have it always at hand. There are no HTML tags allowed besides link tag (<a>). You may add 2 links in your Resource box.
Tips regarding submitting a New Article:
- Do not forget to choose the appropriate Section and Category for your article:

- Do not repeat the intro Text in the main text, since it would appear twice!
- Do not repeat your resource box information in the main text! It will appear twice and could lead that the article will be rejected.
- Do not add more links than 4 into your article since it will not save.
This Tutorial is compliant with Article Factory Manager 1.0.0.
